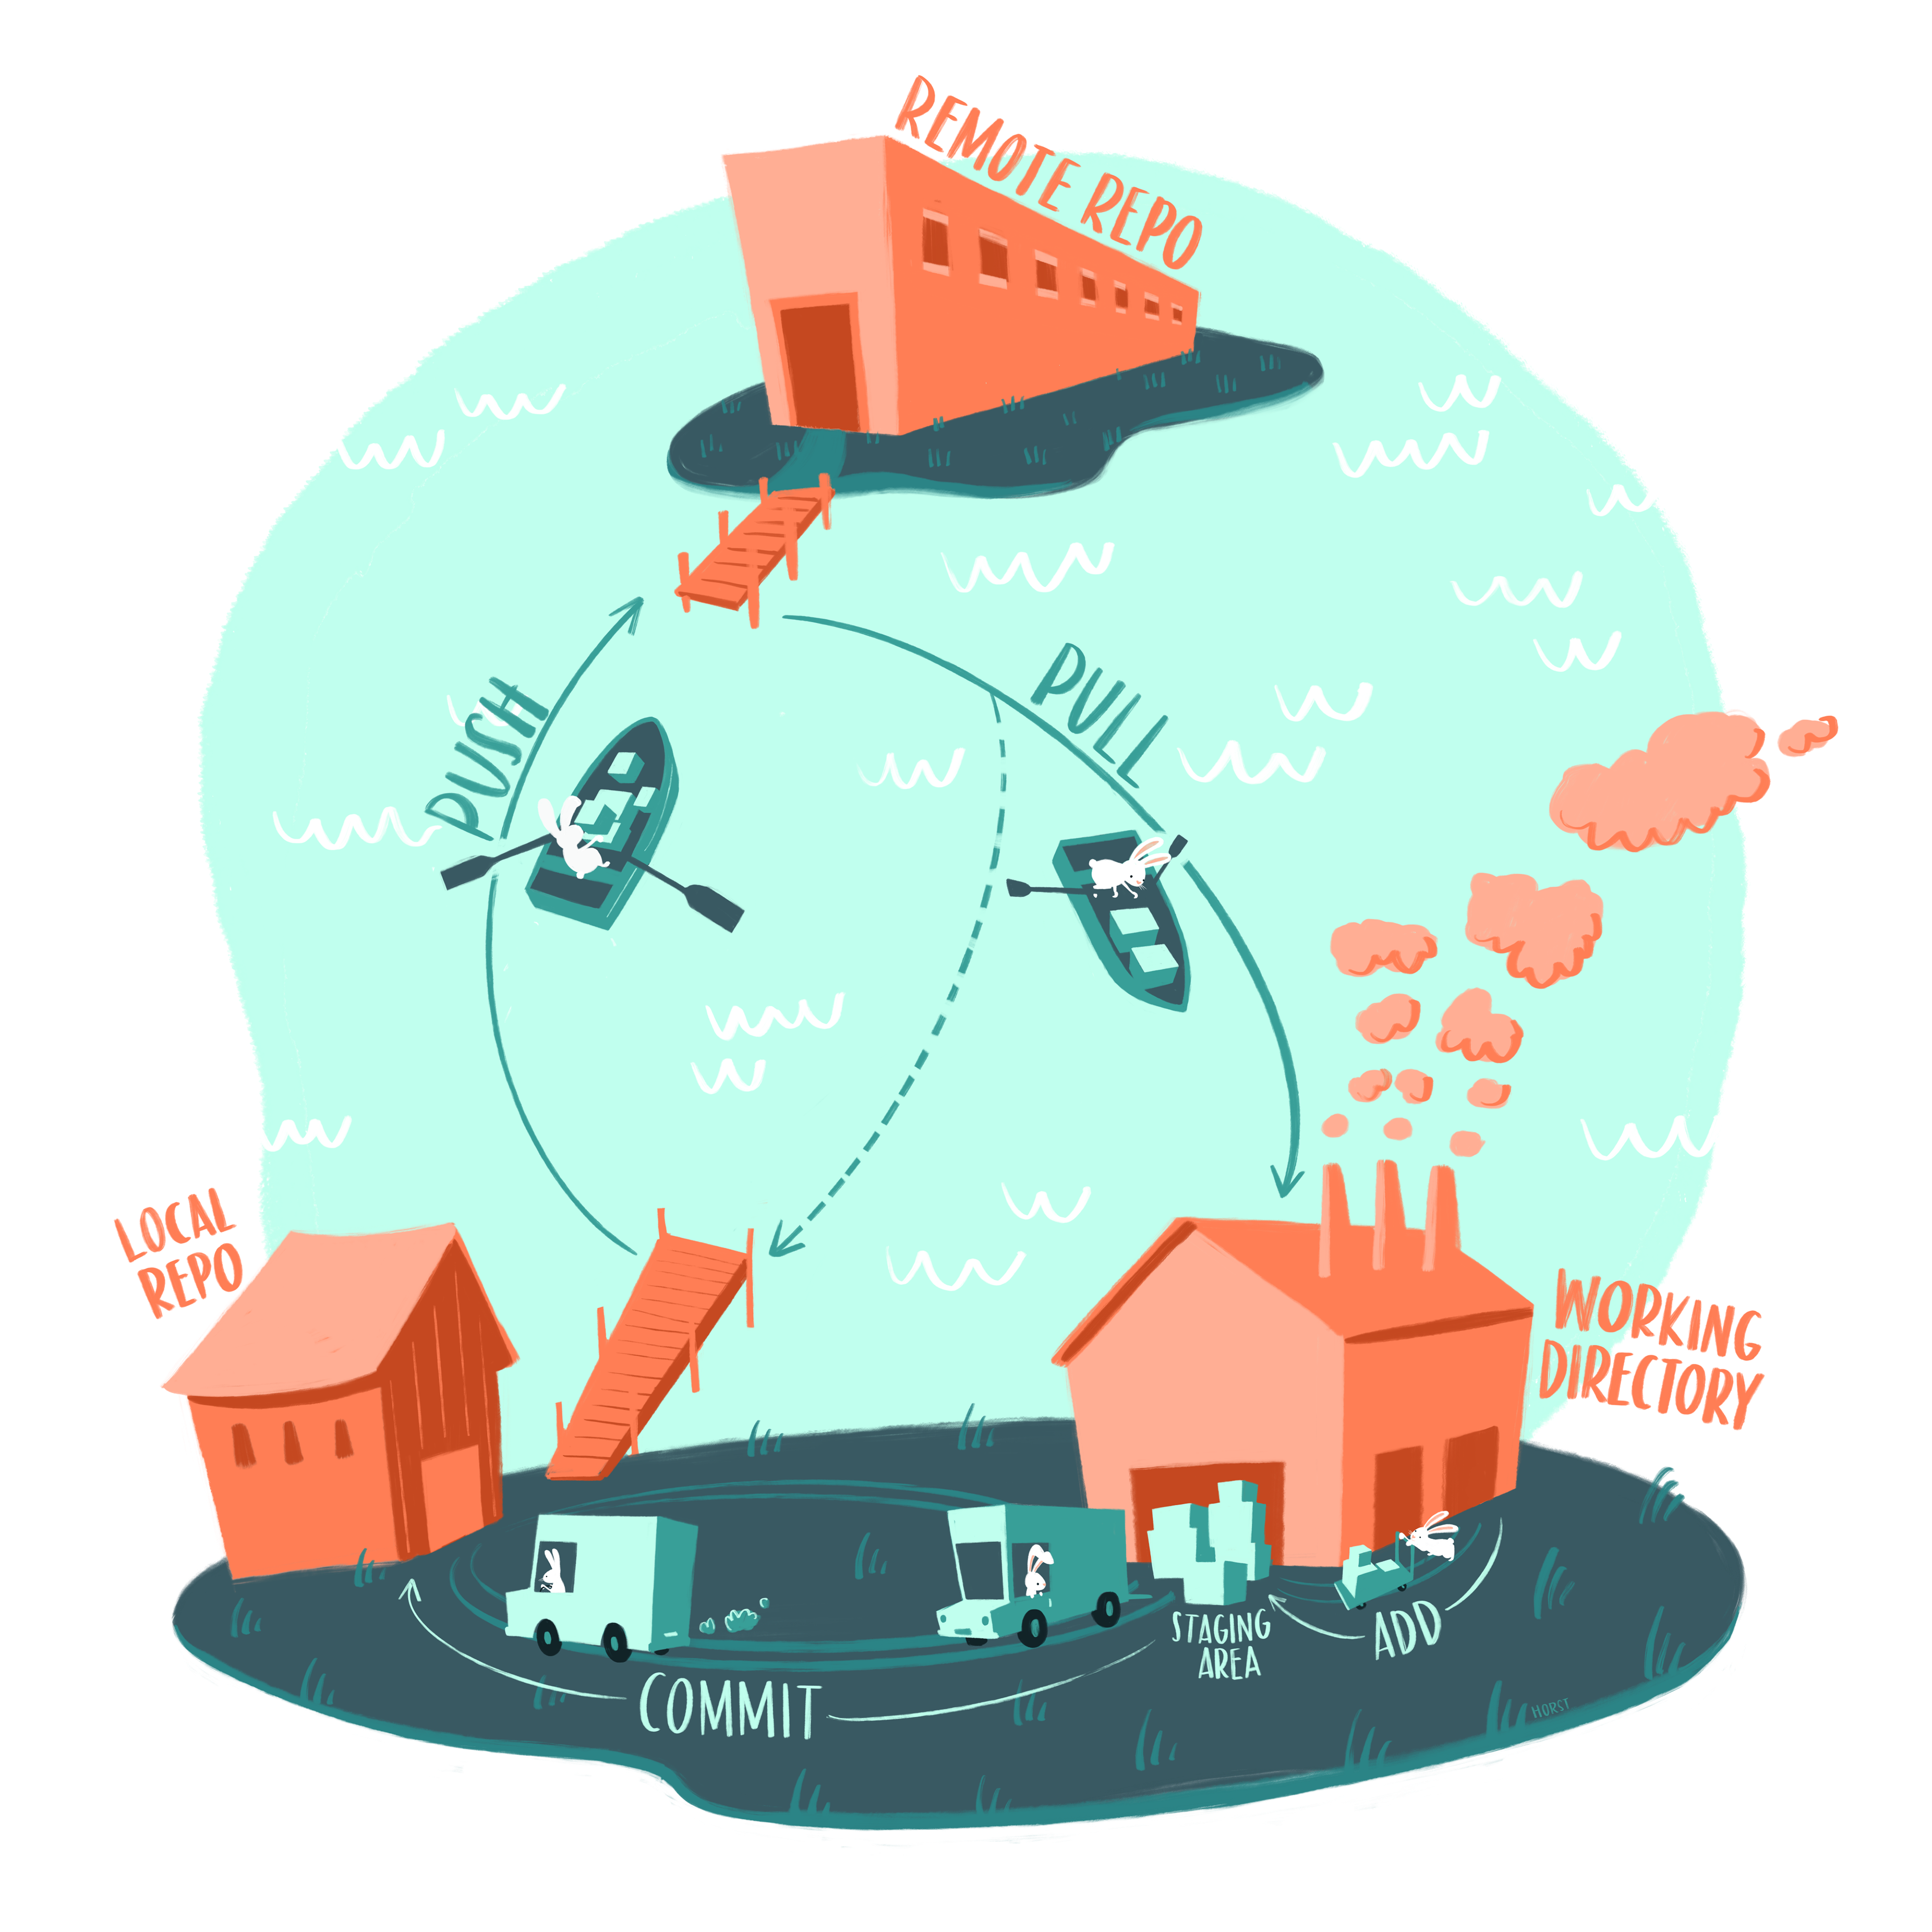
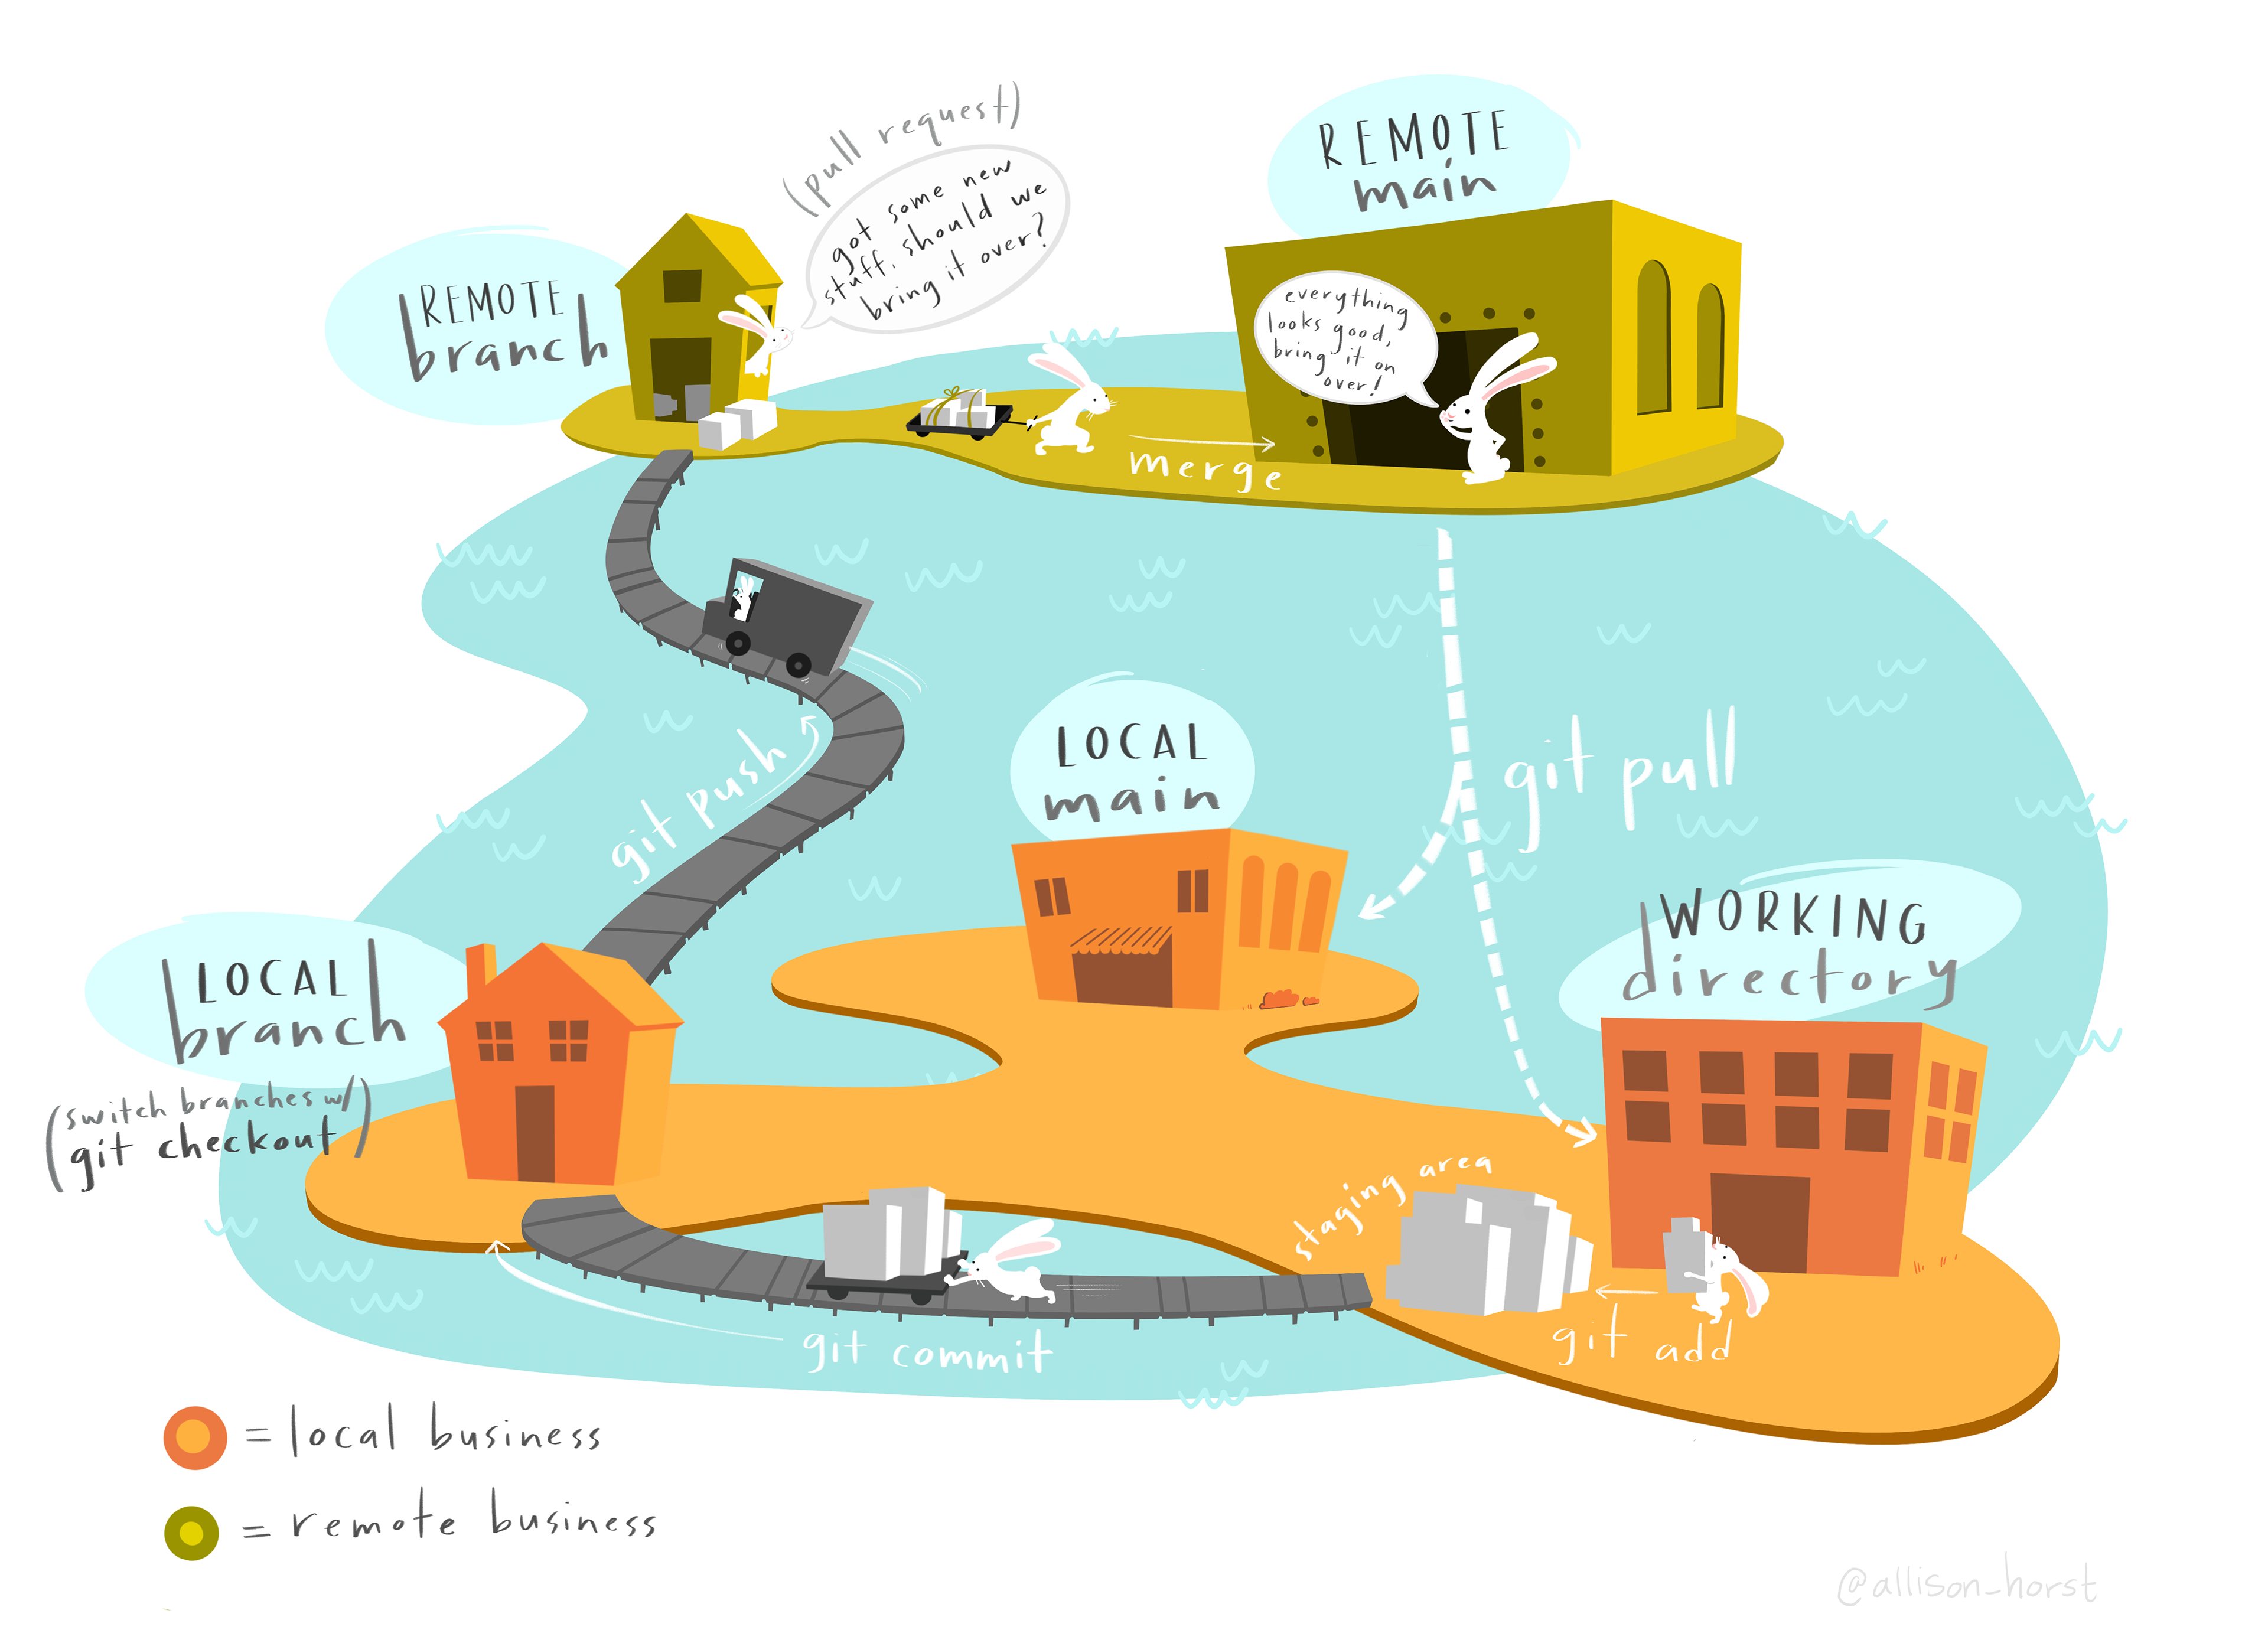
Git and GitHub

Goals

https://datasciencelabs.github.io/2025/extra/git_tutorial.html

https://ywanglab.github.io/stat1010/git.html

  • Create an account
  • Create a repository
  • push something to the repository
  • connect RStudio to GitHub

Install Git

  • Make sure you have Git installed.
  • Open a terminal and type:
git --version

If not installed

  • on a Mac, follow the instructions after typing the above.
  • on Windows follow these instructions

Motivation (1)

We want to avoid this:

Posted by rjkb041 on r/ProgrammerHumor

Motivation (2)

  • This is particularly difficult to manage when more than one person is collaborating and editing the file.

  • Even more important when there are multiple files.

Why use Git and GitHub?

  1. Sharing.

  2. Collaborating.

  3. Version control.

What is GitHub?

  • A Microsoft service that hosts the remote repository (repo) on the web.

  • This facilitates collaboration and sharing.

  • The main tool behind GitHub is Git.

  • Similar to how the main tool behind RStudio is R.

GitHub Repositories (repo)

  • You will have at least two copies of your code: one on your computer and one on GitHub.

  • The GitHub copy is considered the main (previously called master) copy (branch) that everybody syncs to.

  • The main branch is the code-base (ground truth).

  • Updates/revisions are inserted into main through pull request (CI).

Other features of GitHub

  • Recognition system: reward, badges and stars.
  • You can host web pages, like the class notes for example.
  • Permits contributions via forks and pull requests.
  • Issue tracking
  • CI & CD Automation tools

Create a GitHub account and repo

  • Create an account at https://github.com, by picking a professional sounding name.
  • Create a repo (e.g. STAT3000) by clicking the + icon and follow the instructions, toggle on adding README.md. The repo site looks like:
https://github.com/your-username/your-repo-name.git

Create a Local Repo using RStudio (easy way)

Follow these steps:

  • RStudio -> New Project -> Version Control -> Git -> enter the GitHub repo address->Choose a local parent directory

  • The local repo now is connected to the remote GitHub repo

Connect to Remote Repo: Auth

  • There are two ways to connect: HTTPS or SSH, each requiring different credentials.

  • HTTPS uses a Personal Access Token (PAT). More.

Account->Settings->Developer Settings->Personal Access Tokens->Tokens(Classic)

Instruction

  • Note that your GitHub website password isn’t your access token.

Connect to GitHub from a local repo

https://ywanglab.github.io/stat1010/git.html

  1. initialize the directory:
git init
git branch -M main #rename the branch name to main
  1. Let Git know what is the remote repository.
git remote add origin <remote-url> # Follow the auth steps

Now the two are connected.

Note

origin is a nickname for the remote. It can be a different name, but this is the convention.

Privacy Privacy Privacy

  • The next step is to let Git know who you are on Github.

  • Type the following two commands in our terminal window:

#
git config --global user.name "Your_chosen_nickname" #(do not use real name for privacy)
git config --global user.mail "12345678+your_github_name@users.noreply.github.com" 
# get your private email from 
# GitHub->Settings->Emails->"Keep my email private"

Main actins of Git

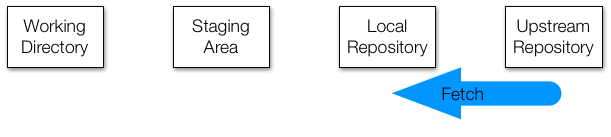
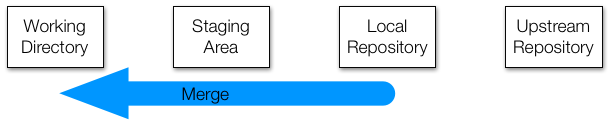
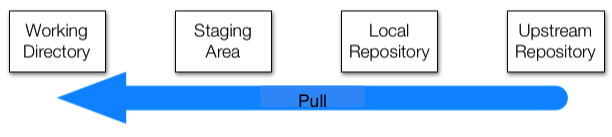
  1. pull (= fetch + merge) changes from the remote repo (alwasy do this before
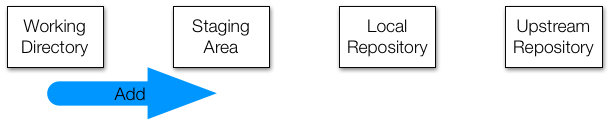
 git push will save you a lot of headaches)
  2. add files, or as we say in the Git lingo stage files.
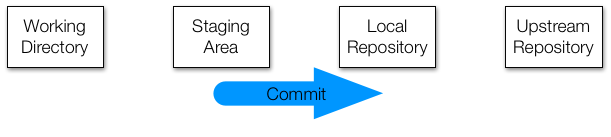
  3. commit (save) changes to the local repo.
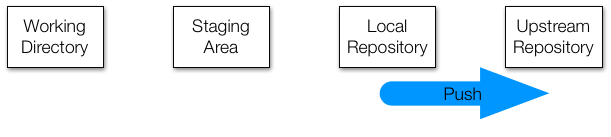
  4. push changes to the remote repo.

Git action in Pic

The four areas of Git

git status

git status [filename]

Stage a file: git add

Use git add to put file to staging area.

git add <filename>

We say that this file has been staged.

  • git add .: new + modifiled files, does not stage deletions: Scope: Current dir only
  • git add -A: new + modified + deletions. Scope: Entire repo.
git status <filename>

Commit (Save a Version or Versioning)

  • To move all the staged files to the local repository we use git commit.
git commit -m "must add comment"
  • Once committed the files are tracked and a copy of this version is kept. (committed=tracked)

  • This is like adding V1 to your filename.

Commit

Note

You can commit files directly without using add by explicitly writing the files at the end of the commit:

git commit -m "must add comment" <filename>

or automatically stage tracked “modified + deleted” (but not new/untracked files)

git commit -a -m "must add comment" #-a: all tracked files

Push

  • To move to upstream repo we use git push
git push -u origin main
  • The -u flag sets the upstream repo (only need once)

  • So going forward we can just type:

git push

Fetch

  • To update our local repository to the remote one we use
git fetch

Merge

  • Once we are sure this is good, we can merge with our local files:
git merge

Pull (=Fetch + Merge)

git pull

Restore a file (content) from the latest commit

git restore filename
git restore . # Discard ALL working-directory edits

Discard local changes to a file and restores it to the last committed version (HEAD). The file remains to be tracked, but no new commit yet.

Old way:

git checkout filename

Related commands:

git restore --staged  filename # Ustage only(restore index)
git restore --staged . # unstage everything
git reset file # Unstage, keep edits

Restore from an older commit (version)

git restore --source=< 7-digit-commit-id> < filename>
git restore --source=HEAD~2 index.qmd # two commits before the current HEAD

Older way:

git checkout <7-digit-commit-id> <filename>
  • You can get the commit-id using
git log filename

Reset: move HEAD/index

git reset --soft HEAD~1 # move HEAD only (keep staged + working changes)
git reset HEAD~1 # move HEAD + unstage changes (keep working edits)
git reset --hard HEAD~1 # move HEAD +reset index +overwrite working tree (dangerous)
git reset file # Unstage, keep edits
  • restore: file-centric (contents in working tree/index)
  • reset: history/index-centric (moves HEAD and/or index)

Branches

  • Each repo can have several branches useful for working in parallel or testing stuff out

Art by: Allison Horst

Show branches

git remote -v #verbose: with details
git branch # show branches

Create branches

git branch new-branch-name # create a new branch
git switch -c new-branch-name # create and switch
git checkout -b new-branch-name # create and switch (old way)
git switch -c feature-x main # create from a specific branch
git branch feature-x HEAD~2 # create from a specific commit

Clone a Remote repo

  • It let’s download an entire repo, including version history.

https://ywanglab.github.io/stat1010/git.html

git clone <repo-url>